There are two ways to add users to your Academy. You can either add them manually one by one or add several at a time by uploading a spreadsheet containing all the necessary information.
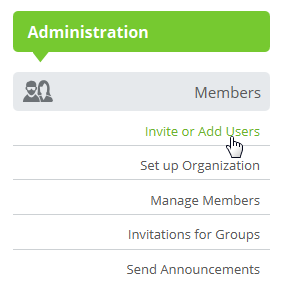
To add new users, select Admin in the top navigation bar. Then under Members on the left, click Add or Invite Members.
Under the Add Users sub-tab, select either the Employees or the External Members tab, based on the type of users that you want to add. Note that you can only add new users here, you cannot make any changes to existing users.
Add Users Manually
To manually add employees or external members one by one, please follow the instructions below:
- Click Add Row to create a new record and start to fill in the user's fields.
- Firstname and Lastname are required fields. You can also add an External ID if needed.
Note: If the user being added already exists in Schoox but has not yet been added to your Academy, the External ID field remains editable and can be updated as needed. - Add an Email or/and Username for your user. Email is optional if you add a Username and vice-versa. Adding an email is strongly suggested.
- The password for each individual is automatically generated but you can also select to add a custom password. Make sure to change the Force Password field to Yes, if you want the user to select a new password upon the first login.
- Select to assign the user to an (Above) unit and a job. (Optional)
Please note that these fields can be configured as required, if necessary. To do so, navigate to Admin panel > Academy Settings and locate the Organizational Structure section. Under Add User Required Fields, you can designate the Above Unit/Unit, Job, or User External ID as mandatory fields. - Set the user's Preferred Content Language. (Optional)
- Give the user an Academy Role such as Admin, Training Manager, Content Manager, or Hourly Worker. (Optional)
- Set the Custom Attributes of your Academy for this user if needed.
Read more: Adding Custom Attributes to Academy Members
- Firstname and Lastname are required fields. You can also add an External ID if needed.
- Check a row's box and click Copy Row if you wish to add the same employee with a different Unit and/or another Job. When added into Schoox, the rows will then be merged into one.
- Check the row's box and click Delete Row If you need to delete a row. Select Clear All if you want to delete all the work you’ve done up to that point.
- Schoox will automatically warn you about any errors by turning a row red and displaying an error code in the error column. Hovering over the error code will reveal what the error means. You can click the Clear all errors option if you wish to erase the records that seem to experience one or more of the issues mentioned below.
Error Messages:
- 201: Already a member of the Academy
- 202: Username already exists in the Academy
- 203: External ID already exists in the Academy
- 204: The person you are going to add has the same username as someone in the academy
- 205: External ID already exists in the Imports
- 210: Email or Username is required
- 211: Firstname and Lastname is required
- 212: You must select a Unit
- 510: Unknown Type Name - Above Unit or Unit does not exist
- 564: Please provide a real email
- 610: Unknown Job - Job does not exist
- 611: An Above Unit or Unit is required
- 612: Insufficient Privileges to mark Admin, Training Manager, or Content Manager role
- 911: Invalid email
- 912: Password must be at least 6 characters
- 913: Not valid user language
- When finished, click Submit to bring them into your academy.
Please note that if you select to not add an email to the user you are adding, the user will not receive any notifications from your academy.
Upload Users via Spreadsheet
To upload multiple users at once, please follow the instructions below:
(please note that this option is not available for external members)
- Click Download Template to download the sample spreadsheet. You can use this as a template to fill in the user's data.
- Input all users' info into the file. Please Note: each row corresponds to a user record. After finishing, save the file to your computer.
- Click Upload File and select the file you have just saved. Click Upload to start the uploading process.
- When this file is loaded, your employees' data will be populated on the page.
- Correct any errors you might get and add or delete rows if necessary. Schoox will automatically warn you of any errors by turning a row red and displaying an error code in the error column. Hovering over the error code will reveal what it means.
- Click Submit to start the process.
- Individuals added will automatically receive an email from Schoox with their password if they have an email listed.
Notes
- If you try to add a user who already exists in Schoox (based on the user's e-mail), the user’s details will be filled in automatically. Details such as the user’s e-mail and name can’t be edited with the Add Users tool. You can only add information related to your academy, such as the user’s job, above unit, etc.
- You can also add a user in multiple units or different job roles by creating multiple copied records of the same user; in such a case only the user information (name, email, etc.) from the first record will be taken into account. All other academy information, such as jobs and units from other records, will be merged.
- You can’t upload an excel file if your page already contains one or more user records
- If a password already exists, the corresponding field will be marked as "Already Set" which means you can’t change it.
- You can import up to 200 records at a time.
- If the same name is used for multiple Above Units, you can identify which is the correct one, by checking the relevant Above Unit Type. If you need to add a user via an excel file, just make sure that you have added the Above Unit Type next to your Above Unit's name. As an example, if you have:
- Above Unit "A" of type "X" and
- Above Unit "A" of type "Z"
the relevant fields in the template should be: A-X and A-Z
Feel free to contact support@schoox.com, in case you experience any issue or need additional information on this process.
Updating Users
If you are an academy administrator, you can also manually update users who already exist in your academy through the Add Users page.
When you enter an email address or username, the system will check for a matching user within the academy. If a match is found, the user’s first and last name will be automatically populated and will no longer be editable.
Any existing information associated with the user will also be automatically populated in the form.
When you save your changes, a notification will appear to inform you that some users will be updated rather than newly created.
Please note the following:
- When assigning existing users to above units and units, admins will only be able to add and not remove. If the unit field is left blank, for example, the units of which the member is a part will remain the same.
- You can assign an Above Unit or a Unit, you can assign a Job and you can also update the 'Force password' option and custom fields of this user.
- When adjusting custom fields, admins will only be able to set or change the values of custom fields, not remove values from them.
- The fields that will not be updated via the Add Users page, even if you change them are the user's identifiers such as the user's first name, last name, username, password, email and external ID. If you want to do so, you will need to adjust those fields by editing their information directly through the Manage Team Members page.
- When adding a user that has a preferred language, the set language will appear as preselected in the grid. However, the language cannot not be updated on the Add User page.
- When adding a user that has a role (system or custom) the Roles fields will be disabled. Roles will be available when editing the user directly.
- When adding a job, the original job(s) must be included; any job not listed in the upload will be removed.
- The super admin of the academy cannot be updated via the Add Users page.
- Editing a user's identifiers through the Manage Team Members page is intended only for correcting or maintaining that same person's own record. Please update an existing account only when it belongs to the individual you intend to manage. Do not change an existing account's personal information, such as name, username, or email address, in order to assign it to someone else, and never use this option to convert an existing account into a different person's account. If Schoox identifies an account that belongs to another individual, please create a new user account with unique user information instead.
Related articles:
Setting Required Fields When Manually Adding Members
How Yes/No Fields Are Interpreted When Left Blank During User Import